Hand Painted Christmas Ornaments
These are sure to be eye catchers on the Christmas tree and great little stocking stuffers for your friends, relatives, co-workers or anyone really. Probably not so great for children but the children can participate in the project to give as gifts too! Grandparent’s especially love handmade gifts from grandchildren. I made two different kinds of ornaments this year.
Wooden Embellishment Ornaments
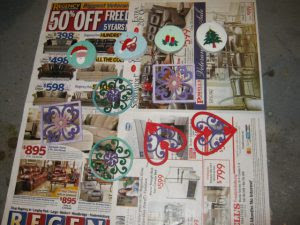
These Embellishments are really cool looking and easy to paint too! There’s no right or wrong way to paint these and you can use any colors you want. Kids will love to experiment with these. After I got done painting mine and they dried I applied some red glitter glue to them. It’s kind of hard to see in the picture but it really added a nice touch. After they were completely dry I sprayed a couple coats of clear acrylic sealer on them making sure to let them dry between coats. Lastly I attached some green ornament hooks on them for hanging on the tree.
Wooden Sliced Disc Ornaments
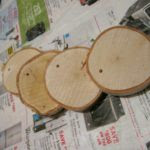
You can buy these Unfinished Discs at most craft stores or at Amazon. Try to get them pre-drilled with the holes in them so you don’t have to drill the holes yourself.
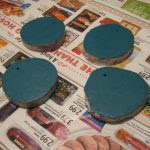
First paint the backside of the discs. I did mine a solid color but you can make them multi colored or have pictures on both sides if you want. I used 2 coats of paint and let them dry completely.
Then I painted 2 coats of a lighter background on the front and let them dry completely in between coats and before transferring the pictures onto them.
If you want, use some of my choices at the bottom of this page for your ornaments or come up with your own ideas. After painting the pictures and letting them dry completely I applied a couple coats of clear acrylic sealer making sure to let it dry between coats.
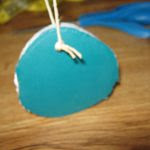
I tied some Twine on them for hanging. First, cut 14 inches of twine.
Then, put it through the hole, tie it and pull the knot to the back of the ornament.
Now make a knot on the top of the ornament.

Ideas for ornaments pictures:
To transfer these pictures to your ornaments, place graphite paper face down on the ornament. Then position the downloaded page with the picture of your choice on top of the graphite paper centered on the ornament. Using a ball point pen or tracing instrument lightly draw around the outline of the picture you want to be on the ornament. Then you have a guideline to paint.
Click Here to download the template for these pictures.
Please leave any questions or comments below in the comments section.
This page contains ad links.








No comments:
Post a Comment